How to Use Scan-to-Email
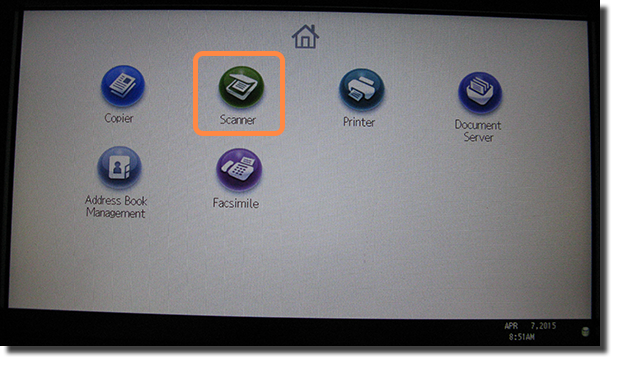
- On the printer's home screen, tap SCANNER.
- If you require settings other than the defaults, set them.
(Defaults: 300 dpi, auto color, single sided, multipage PDF)
- Select your name from the list of users.
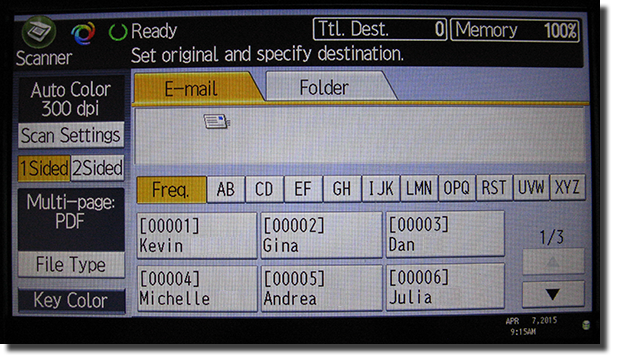
If you aren't on the list, follow the steps in one of the procedures listed below:
- Insert your document(s) face up in the document feeder.
- Press Start.
You'll receive a message from the printer with your document attached.
Ways to Specify Your Email Address
Enter your email address for just this document
This procedure assumes you completed steps 1 & 2 above.
- If your screen looks like this:

press the SIMPLE SCREEN button on the Ricoh's keypad, which will switch the display to a more complex version, like this:

- On the more complex screen, tap MANUAL ENTRY.
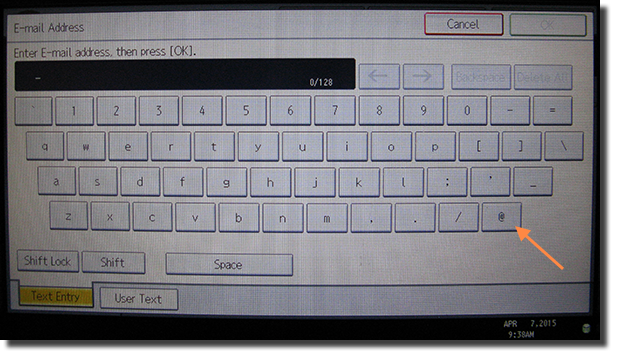
- Use the on-screen keyboard to enter your email address. The "@" symbol is helpfully located at the lower right. Tap OK when finished.
- Continue with step 4 of the procedure above.
Add Your Name and Address to the List of Users
- Return to the printer's Home screen.
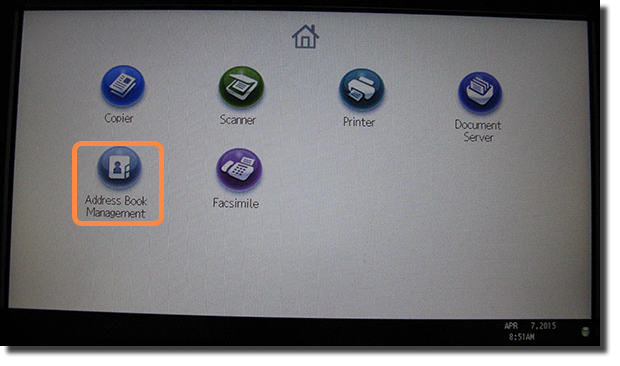
- Tap ADDRESS BOOK MANAGEMENT.
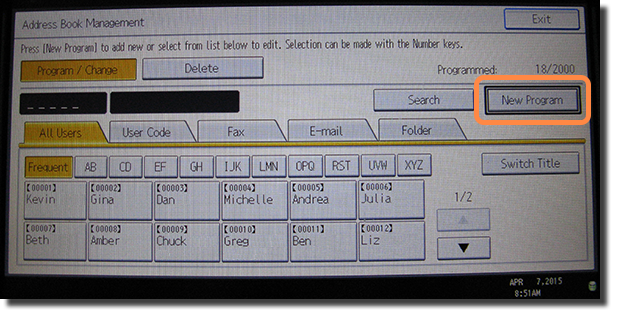
- Tap NEW PROGRAM.

- Next to Name, tap CHANGE.

- Use the on-screen keyboard to enter your name, then tap OK.
- Next to Key Display, tap CHANGE.
- Use the on-screen keyboard to enter the text you want to appear on your button in the address book, typically a short but useful identifier. Then tap OK.
- Tap E-mail.
- Use the on-screen keyboard to enter your email address. The "@" symbol is helpfully located at the lower right. Tap OK when finished.
- Tap OK to leave the Program / Change Address Book screen.
- Tap EXIT to leave the Address Book Management screen.